Our airport setup (weather station, cameras and LiveATC audio feed)
In this post I describe how I set up weather station, live camera feed and liveatc.net audio feed for our little airstrip.
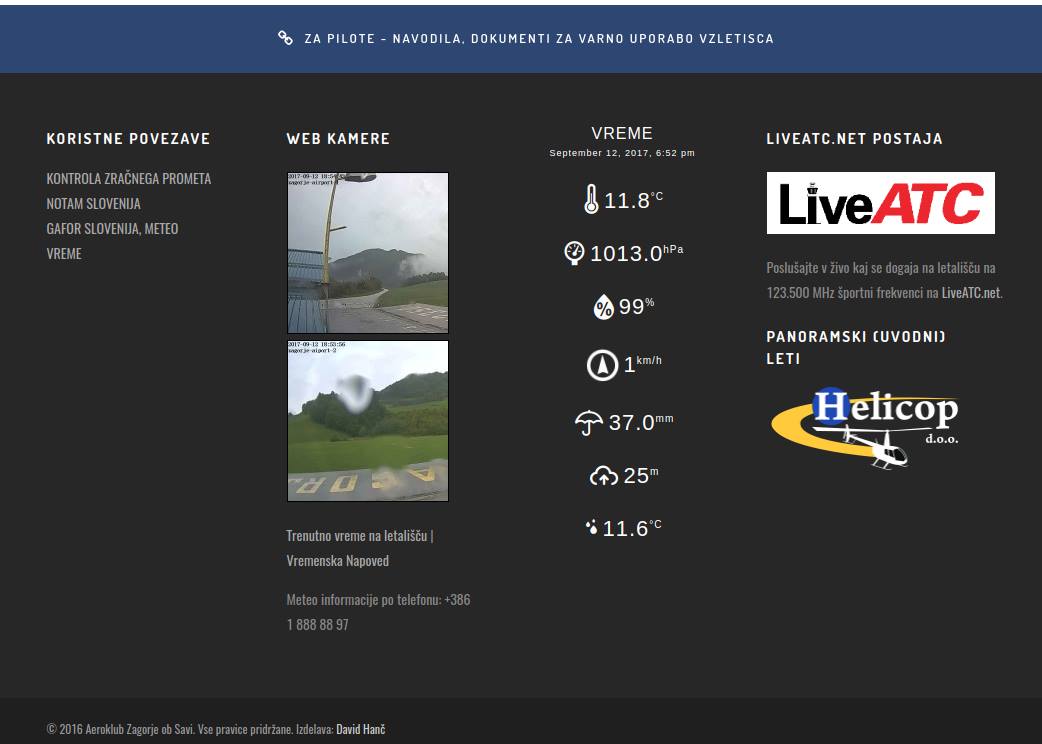 Real-time camera feed and weather information displayed on the club website.
Background
A while back I moved from Ljubljana to a small town around 30 km East of Ljubljana. Before I moved here, I used to fly small single engine planes (for fun) out of Ljubljana Airport and Portoroz Airport.
This means that both of those two airports are now too far to regularly fly out of them. With no traffic, it would take around 1 hour to get to Ljubljana Airport and around 2 hours to get to Portoroz Airport. Those two hours can easily turn into 3 hours during peak summer time when highway is full of holiday travelers (done that once, have no plans to repeat it).
Regular flying is very important to stay current and be a safe pilot so I needed to find a new airport which is closer by. Luckily there are two airports in the 30 minutes driving distance - Airport Zagorje ob Savi1 and Airport Sentvid Pri Sticni.
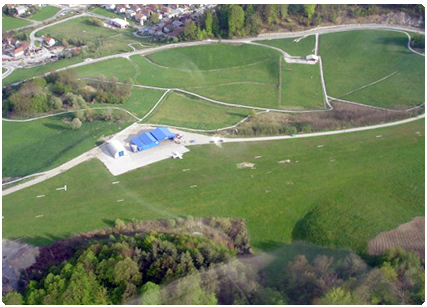 Zagorje ob Savi Airport (Vzletisce Ruardi).
Both of themare small, un-towered general aviation airports with a relatively short grass runway.
For some reason, I decided to visit Zagorje ob Savi Airport and club first. There I met a bunch of dedicated, friendly and welcoming people. They were the main reason I decided to make this my new “home airport”.
Both of the airports I used to fly from, were bigger towered international airports (for Slovenian standard, but in global scheme of things, they are still really small and low traffic airports). Compared to those airports, this small airport also feels a lot more casual, social and homey[^2].
As a big DIY person, I really love connecting / automating / improving things with technology, so I also wanted to bring some of those improvements to the airport.[^7]
In this post you can learn a little about our setup - notably our weather station, web camera feed and LiveATC audio feed.
Internet and Networking Setup
To be able to add some technological improvements to the airport, we first needed an internet connection. Sadly there is no fixed internet connection at the airport, but there is good 3G / 4G coverage so I decided to re-purpose one of my old Android phones to act as an access point.
I purchased a local prepaid plan with 50 GB monthly data cap and utilized tethering functionality on an Android phone. So far, the whole setup has been online for almost a month and we haven’t encountered any issues yet.
Based on the data usage calculations I did[^4], 50 GB should also be plenty.
Because the devices are behind NAT and all the incoming connections and ports are blocked, I set up an SSH tunnel and port forwarding from a Rasperry Pi which is behind NAT to an outside cloud-server to which I have access. This way I can tweak and change various settings, without needing to be physically present at the airfield.
Weather Station
Weather is one of the most important factors for flying (especially for small single engine planes in VFR conditions) so getting a weather station was the first thing I did.
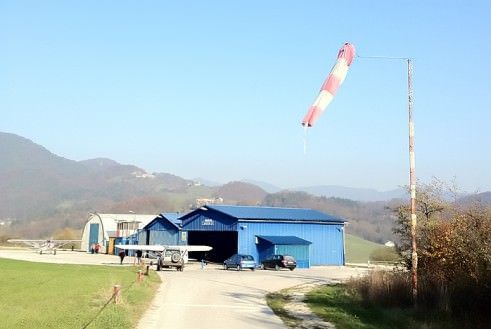
It’s also worth noting that the airfield already had a wind sock before. Since wind is a very important factor in flying, windsock is one of the many mandatory things a place needs to be officially classified as an airfield or an airport.
I did some research and I decided to purchase a Fine Offset WH2900 weather station.
Here is a list of minimum featuresthat a weather station needs to have for me to consider the purchase.
- temperature, dew point data
- weather data (direction, speed)
- pressure data
- rainfall data - nice to have, but not mandatory
- ability to easily fetch data via USB or similar, or ability to automatically send data to the internet
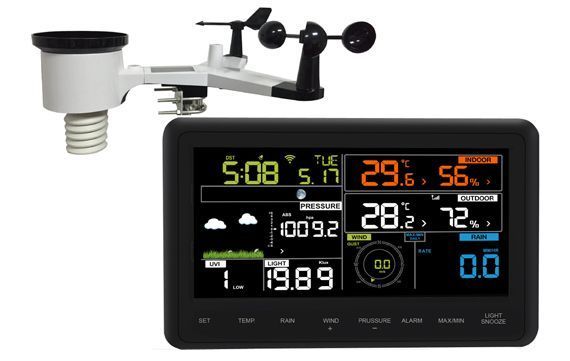 Fine Offset WH2900 weather station, sold under various different brands and names.
This weather station offered all these features and based on the specifications and reviews I read online, it offered the best price / performance ratio in this range (there is of course no upper limit for the price and you could easily spend more than 1000$ for a more professional weather station).
It’s also worth noting that Fine Offset is a Chinese OEM and I purchased the station from a German company on Amazon under a different name (there are many companies which sell those weather stations under their own brand).
Luckily, the tower at the airport already had an antenna pole on which we could install the station. The location of the weather station is one of the most important factors if you want accurate data. Trees, houses and other obstacles in the proximity can all affect the readings.
weathe station installing data tower
The pole itself offered a good location, because it’s quite high (around 6 meters) and relatively far from things which could affect the readings.
The setup itself was simple, because the weather station only needs to be connected to the wireless access point and configured to send data to Weather Underground.
Sending data directly to WU is good because it’s easy to set up, but it also means you are locked-in to an online service and there is no official way for the weather station to send data to your personal server or directly grab data from it.
As a big open-source proponent and believer that everyone should have access to their own data, this was especially a big downside for me. This and lack of security are also one of the main reasons why I’m so skeptical and worried about the whole IoT movement.
Luckily, there is a great open-source project called weewx out there which allows you to fetch data from the station. This project retrieves data from the weather station by sniffing and reverse engineering the network traffic sent to WU by the weather station.
Now that the station was set up, we can easily see this data in real-time on the LCD display which also acts as a base station and online on Weather Underground.
 Real-time weather data as shown on Weather Underground.
It would also come handy for this data to be available in concise form via text message and over the phone so I decided to implement “poor man’s ATIS / AWOS”.
For that, I utilized Weather Underground API, some Python and Plivo telephony service. Python script fetches real-time data using the WU API, caches it and process it so it works with Plivo text-to-speech API.
I originally tried to use Twilio as I had experience using it in the past, but it couldn’t get it to work with a Slovenian inbound phone number. I was able to reach the phone number if I used Skype call or foreign phone number, but none of the Slovenian telephony providers were able to route phone calls to it.
In addition to this data (wind, pressure, temperature / dew point) being useful to flying, we can now also observe various short and long term weather patterns and trends. If you are a bit of a weather geek like myself, that’s quite cool.
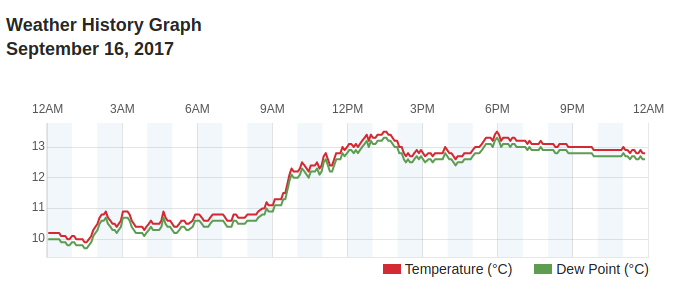 Very small temperature and dew point spread? Very likely there is fog and low clouds at the airfield.
Web Cameras
Ability to view real-time weather information is useful, but it would be even better if you could also see in real-time what is going on at the airport.
And that’s where the web cameras come in.
In addition to allowing you to see what (if anything) is going on at the airfield, cameras are a great addition to real-time weather information when you are evaluating weather. They allow you to see real-life conditions and things such as cloud coverage, fog / mist, etc.
I already had a bunch of Foscam C1 wide-angle HD cameras at home so I decided to lease / move two of them to the airfield.
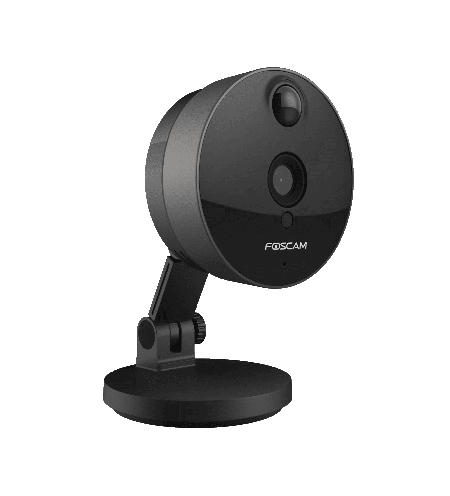 Foscam C1. A relatively in-expensive IP camera which offers decent image quality.[^5]
Since the cameras are meant to be used indoors, we installed them inside the tower to protect them from bad weather and vandalism. The picture is not crystal clear because there is a privacy foil on the glass which makes the picture look a bit darker then normal and there is also some glare from the sun depending on the sun position, but it’s good enough for now.
Now that the cameras were installed, they needed to be configured to stream / send images to the internet. This camera and many other IP cameras allow you to connect to the camera to view stream in real-time or to periodically upload image to a FTP server.
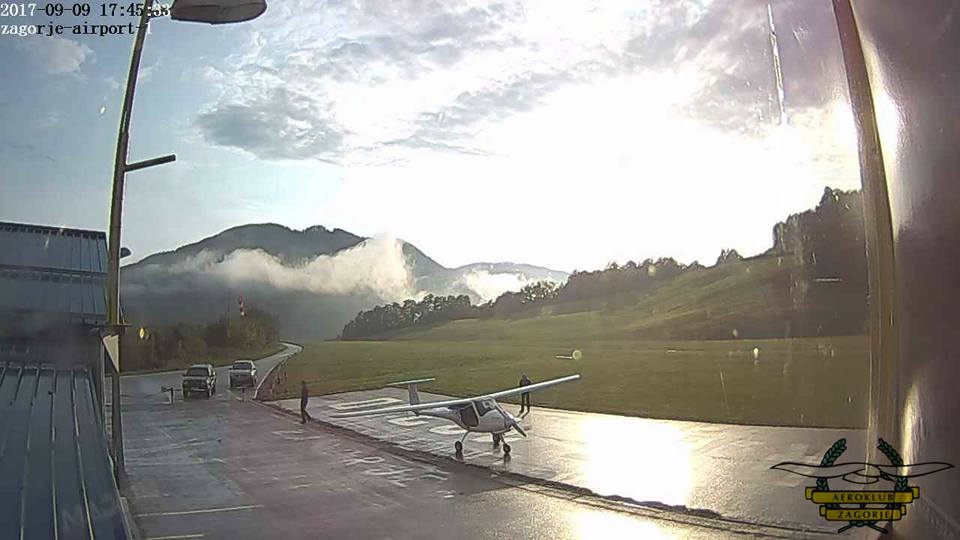 Example image from one of the cameras.
It’s worth noting that this and most other IP cameras are very insecure by default and in many cases, can’t be made more secure (no SSL, many security vulnerabilities, etc.).
This is not so problematic if camera is located in a public place such as is the case here, but I still decided to make it as secure as possible.
The cameras are behind NAT and all the incoming connections and ports are blocked which solves part of a problem. Second part is solved by utilizing “periodically upload image” to FTP functionality. Sadly the camera only supports FTP (insecure) and not FTPS (secure) so I needed to get a bit creative.
I configured the cameras to send images to an FTP server which is running inside a local network on a Rasperry Pi 3 based Linux server. Rasperry Pi then periodically sends those images to a cloud server over FTPS.
This cloud server is also used to automatically process those images (create thumbnails, optimize image size, create time-lapse gifs, add watermark, etc.) and serve them over HTTPS.[^6]
Those real-time camera images can be accessed on the website. In addition to the real-time images, you can also view time-lapse videos for the past hour on the website.
Time-lapse videos are generated from raw camera images every 10 minutes for the period of now - 60 minutes. Serving the time-lapse videos presents some unique challenges. A lot of people will access the website through a phone which can’t (easily) play videos so instead of generating a video file, I decided to generate an animated .gif image.
The problem with that is that animated gif is really a poor storage format for what is basically a video, so I needed to experiment a bit with ImageMagick command line options to find the combination which offers the best quality / size ratio.
By default, generated .gif size was around 28-45 MB, but I managed to get it down to 5-12MB with a reasonable quality.
In addition to the time-lapse videos which are generated automatically for the past hour, raw camera images can be used to generate time-lapse videos of the various interesting time frames (e.g. when a storm passes, etc.). An example of such time-lapse video can be found below.
LiveATC audio feed
Now that the weather station and cameras were in place, the only thing missing was real-time audio feed from the airport.
The airport is un-towered which means there is no ATC, but we do have UNICOM
/ CTAF station on a local sport frequency of 123.500 MHz. This station is
active when there are multiple people flying and offers traffic and runway
condition advisories.[^3]
Nowadays it’s very easy very to set up software based radio receiver by utilizing a USB DVB-T TV tunner dongle based on the RTL2832U chipset. The chip covers a very wide frequency range (24 - 1766 MHz), but if you want good sound signal quality you need to use an antenna specifically optimized for a frequency range you want to receive.
In this case, that is the airband frequency range (108 - 140 MHz). I purchased an inexpensive 30$ airband whip antenna which seems to be doing a good job of receiving transmission from the airplanes in vicinity. It’s also worth noting that VHF frequencies signal follows line of sight propagation which means the antenna itself should be mounted as high as possible and away from any obstructions.
To receive the signal and stream it to the internet, I connected USB dongle to Rasperry Pi model 3, installed rtl-sdr library and RTLSDR-Airband.
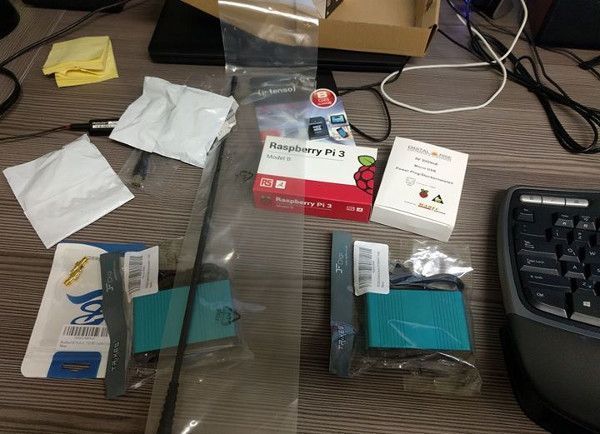 Some of the used equipement.
RTLSDR-Airband is an open-source Linux program optimized for AM voice channel reception and sending this data to online services such as liveatc.net.
Before setting up Rasperry Pi, I connected USB dongle to my computer and used open source Gqrx SDR program which allows you to visualize received signal (strength, noise, etc.) and tweak various parameters.
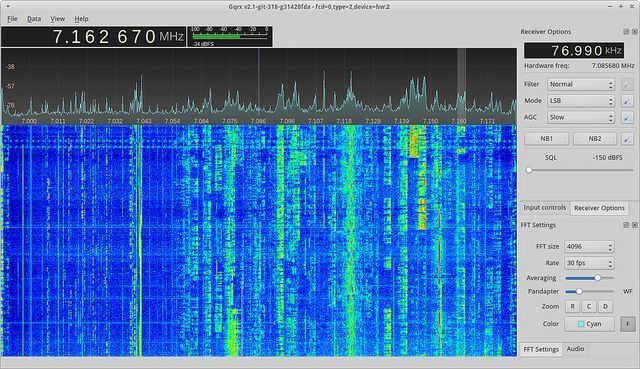 Gqrx is a great open-source program for software defined radio.
This was an important step, because simply connecting dongle to the Rasperry Pi and setting the frequency in rtl airband config usually doesn’t yield good results out of the box.
Gqrx allows you to find the optimal frequency and other settings (gain, squelch, etc.) where the signal is the strongest and audio quality is the best.
If the whole thing wouldn’t work out well, I also had a backup plan. Backup plan involved using a USB sound card and connecting headphones output on the handheld airband radio / transceiver directly to the line-in on the sound card.
Once I found the best settings, I plugged dongle to Rasperry Pi, configured rtl_airband settings and configured rtl_airband to stream audio to my self hosted Icecast server to test it out.
After I confirmed everything was working, I contacted people at LiveATC for settings for their Icecast server so our feed would also be included on LiveATC.
There were some issues because our airfield was the first one without an ICAO identifier, but they were very accommodating and in the end we managed to find a good compromise. The compromise was listing our feed under Ljubljana / LJLJ page.
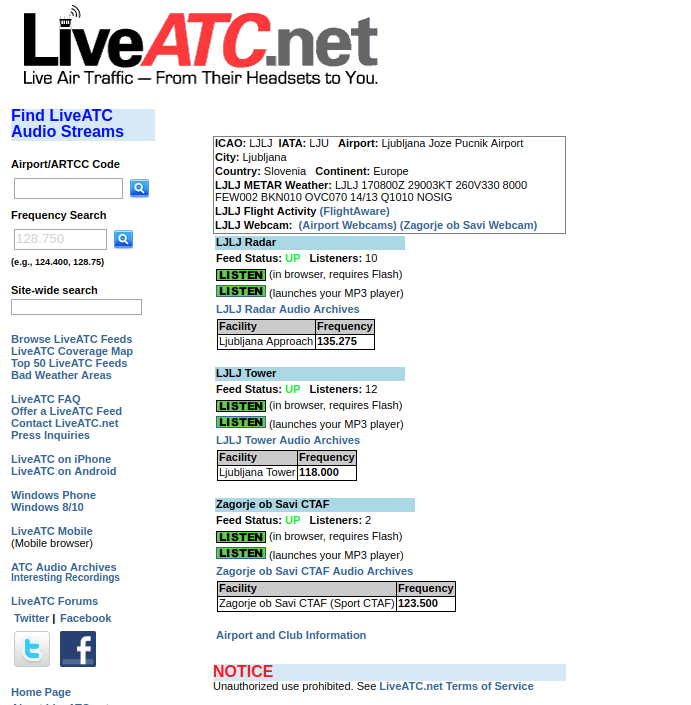 Our feed (including the archives) is available on LiveATC.net.
Future Improvements
The whole setup has been running less than a month so far and I already have some ideas for future improvements and additions.
Traffic Feed
Now that we have live audio feed, the only thing missing is a life traffic feed - ability to see which airplanes are flying in the area.
There are already services such as flightradar24 out there which allow you to track aircraft movements in real time, but mostly, they only track commercial traffic via ADS-B (they also cover some GA traffic, but because of their receiver locations, they only cover airplanes flying at higher altitudes).
There are a couple of ways to track aircraft movements:
- ADS-B
- Via transponder (Mode C / Mode S)
- FLARM (proprietary protocol, mostly used in gliders)
ADS-B provides the most information, but it’s not widely used here in Slovenia (yet).
Mode C and Mode S transponders are more common here. Mode C is not all that useful because it only provides altitude, but Mode S also provides other data.
Both of those approaches use the same frequency (1090 MHz) so it’s possible to receive those signals using the same RTL-SDLR USB dongle which is used to receive audio signal for LiveATC feed.
So in theory, all it takes is a USB RTL-SDLR dongle plugged to Rasperry Pi, antenna optimized for this frequency range and some software on Rasperry Pi which interacts with RTL-SDLR and processes the received signal.
In fact, there are already some projects such as PilotAware out there so we might be able to utilize existing software and won’t need to write our own.
pilotaware radar screen / traffic screen
Power Bank Based UPS
All the devices are connected to the electrical network and haven’t had any power outage yet, but outages can happen so it would be good to be able to connect all the devices to a UPS.
Luckily, all the devices consume very little power so it should be possible to make a simple UPS a USB power bank which supports pass through charging and has a capacity of at least 15.000 mAh.
Equipment List and Costs
For the reference, here is a full list of the physical equipment used:
- Fine Offset 2900 Weather Station - $200$
- 2x Foscam C1 - 2x ~70$ (used to be around 100$ when I first got it, but now you can get it for much less)
- Rasperry Pi model 3, enclosure, micro SD card - ~80$
- Whip airband antenna - ~25$
- NooElec USB RTL-SDR dongle - ~30$
- USB sound card - ~30$ (optional and only needed if you want to use airband transceiver / scanner instead of the DVB-T tunner for receiving audio)
- MCX to BNC adapter - ~10$
In addition to that, other costs include 10$/month for a cloud server and 17$/month for a 4G data plan.
doesn’t meet all the local Civil Aviation Authority rules and standards for an airport, most notably, the minimum runway length. [^2]: “casual” and “homey” don’t need to mean unsafe. For me, safety is the most important factor and always comes first so I never compromise on it. [^3]: Being a non-ATC facility means it can only offers advisories and recommendations, but no clearances or similar. Pilots perform their actions based on their discretion at their own risk. It would be foolish to do so, but pilots can also chose to ignore those recommendations if they wish so. [^4]: New images are uploaded from both of the cameras every 10 seconds, and image size is around 80-150 KB, the audio stream is 16kbps and weather station uses negligible amount of data. For the worst case scenario, this gives a consumption of less than 1.1 GB per day. [^5]: As noted before, most of the popular IP cameras and other IoT devices have a very poor security record so you should be very careful when you install them in a private place and connect them to the internet. Ideally they should be deployed in an isolated network which doesn’t have access to the internet. [^6]: Free Let’s Encrypt SSL certificate is used and CloudFlare is used as a reverse proxy to act as a caching layer in-front of the webserver. [^7]: Flying itself is rewarding and a lot of fun, but being a tech person myself, working on side projects like this one is even more satisfactory and fun than flying :)
-
Well, technically it’s an airstrip (vzletisce) and not an airport. It ↩